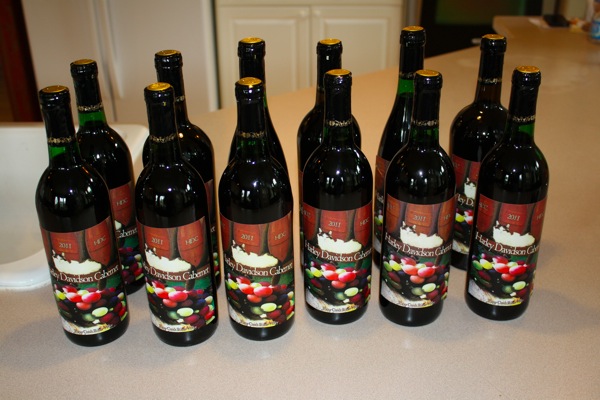
So our Cabernet Sauvignon has been sitting in a carboy for about a month now and is finally ready to bottle.
If you have not been following along, step 1 is here, step 2 is here and step 3 is here.
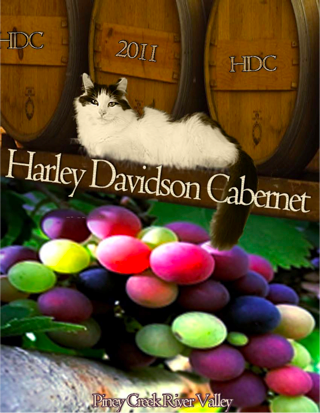
One of the fun things about making your own wine, and something to keep you busy while you are waiting, is playing around with Photoshop a bit and making a label for it (right). After doing a bunch of research online trying to find a label making program and some actual wine label templates from Avery or something at Office Depot, I have found that the best option is to just use a paint program and print them on plain old paper. Then cut them out and use a glue stick to stick them on. Sometimes the simplest solutions work the best. This is also good for recycling the bottles in order to use them again. Labels with adhesive backs that are stuck on, tend to stay that way are are difficult to get back off. Plain paper with a glue stick comes off well so you can use the bottles again.
Most of the supplies you will need to bottle the first time are at the local brew store. You will need about 30 empty bottles and a bag of corks. I suggest fresh corks. Some sites state you can re-use old corks but I have found that once they have been compressed once, they leak and don't work very well. Most brew stores will also rent a bottle corker to you for the day like this one.
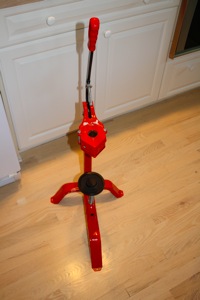
There are some cheaper ones you can buy but they are very difficult to actually use. I ended up purchasing this one for about $75.
This will be my third time bottling and through the school of hard knocks I have found it it very helpful to get everything together in one place and within arms reach to avoid making a big mess. Create an assembly line with lots of counter or floor space.
One of the last steps in bottling is to add some sodium metabisulfite to your wine. Home wine has very low sulfite levels and you need to add some if you want to keep your wine more than about six months. This will act as a preservative and does not change the flavor profile. 1/4 teaspoon dissolved in a 1/2 cup of water will do the trick.
Rack your wine one last time into another container. I use a brew bucket with a spout on the bottom that connects to the bottle filler. This will get the last of the sediment off of the wine, and allow you to use gravity to fill your bottles. Add the Sodium Metabisulfite to the bucket and stir, then place up on a counter.
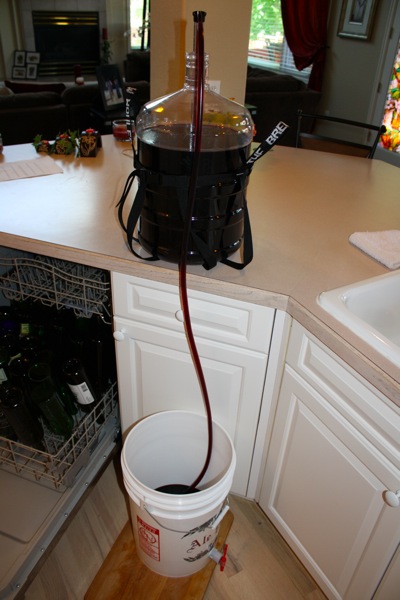
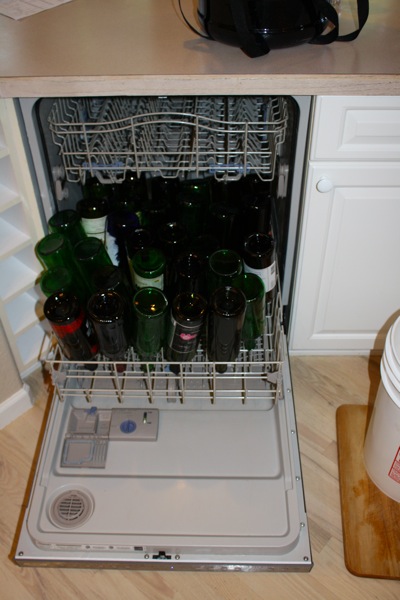
To prepare your bottles, put them into the dishwasher and run them on the glass only cycle to clean and sterilize them. The dishwasher also works very well as a 'shelf' once they are clean to contain the mess. Position the brew bucket above the dishwasher on the counter and use the open door to fill your bottles on. Any overflow stays in the door lid!
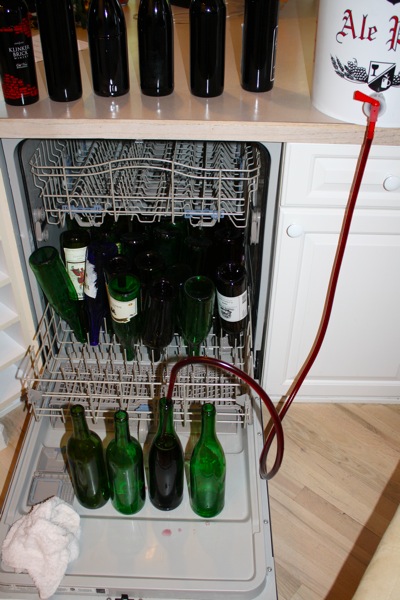
The bottle filler adapter is a piece of glass tubing with a spring loaded valve on one end. when you push it down on the inside bottom of the bottle it releases the gravity fed wine into the bottle. Fill until the wine gets to the top lip of the bottle then lift the filler and the flow will stop. The filler displaces just enough volume so that when you remove it from the bottle, the wine is at the correct level in the bottle, about 3 inches below the lip, so that your cork will fit and have about 1 inch of open space in the neck.
Once all the bottles are full - use the corker to seal them. I sterilize my corks before use as they tend to be purchased in bulk and who knows where they have been. Remember, clean, clean clean! The best way to do this is to put them in a vegetable steamer and steam them for about 5 minutes over boiling water. This will also serve to soften them up a bit and makes corking a little easier.

if you want you can also cap them with foil wrappers. These are also available from the brew store and give the bottle a nice finished look. just slip them over the top and use a hair drier to shrink wrap the foil around the neck of the bottle.
Walla! That's really it. Don't forget to enjoy a glass of your new vino while you are bottling. You will find it does taste young and the longer you let it sit, the better it gets. About 6-9 months from now, it should be at its peak.
Have you made your own wine? How did it turn out? Let me know in the comments or better yet, send me a bottle so I can try it, I'm happy to return a bottle of mine!
