Search Old Posts
RSS and Social

Entries from May 1, 2011 - May 31, 2011

Thursday
May192011

This would also make a great Fathers Day present (hint hint)

Store up to 21 bottles of your best wine under the conditions that the vinter intended with the EdgeStar 21 Bottle Dual Zone Thermoelectric Wine Cooler (model: TWR215ESS). While your wine enjoys the optimal temperature and humidity conditions, you get a wine cooler in one of the most stylish European finishes available with fully digital temperature controls with a blue LED display.

This thermoelectric wine cooler features a premium stainless steel door trim with double paned tempered glass. The tinted glass door protects your wine from harmful light. The interior of the wine cooler features insulated dual temperature zones with scalloped chrome shelves to cradle and display your wine. For a stylish and vibration-free wine storage solution, you can't miss with the EdgeStar Dual Zone TWR215ESS 21 bottle thermoelectric wine cooler.

Thursday
May192011

Pretty cool new little piece of technology.

Might make a great Fathers Day present for that dad in your life!

The smooth little black pebble above from XtremeMac is a new combo charging/bluetooth-streaming option called the InCharge Home BT ($80). Pretty simple concept: Plug it into a wall outlet, then hook it up via the 3.5 mm jack to any speaker system and bango, you’ve given the system Bluetooth streaming capability, which means you can stream music to your speakers from any iDevice or Mac; then use the USB port to charge stuff (comes with a USB t0 30-pin connector and a 3.5 mm jack cable).

Tuesday
May172011

Making your own wine, Step 3: Stabilizing and Clearing

Well it is a slow and lengthy process, this wine making thing. If you are looking for instant gratification - you likely will not get any satisfaction here.  But the end result is so worth it.

Step 1 here.  Step 2 here

Our wine has been gently going through its secondary fermentation for the last 10 days and is now ready for Stabilizing and Clearing. In this process, the specific gravity should now be 0.996 or less, and should also be stable and not change over two consecutive days. If it changes, let your wine continue to sit, checking the SG each day until it is done Mine is now sitting stable at 0.990.

Now that it has stabilized, we want to stop any residual fermentation from occurring and move off all of the used yeast, as well as any remaining clay left in suspension. This is accomplished in two steps. We also want to remove as much of the trapped gasses from within the liquid as possible. Using the wine thief, remove about a litre of the wine from the top of the carboy. This can be stored temporarily in a clean, steralized wine bottle. This will give you enough room in the carboy to stir it well without overflowing.

Next, we dissolve the packet of metabisulphite that came in the kit into a half bottle of bottled water, and add it to the carboy. The metabisulphite accomplishes two tasks, it will help to prevent any wild microorganisms from growing and it also acts as an antioxidant, protecting the color and flavor of the wine. As part of the chemical reaction it produces SO2. So this is where we drill mount paint stirrer comes in handy. Clean and sterilize the bit and then use it to mix the wine thoroughly. Mix for a minute or so and then let it rest until all the CO2 from the fermentation as well as the SO2 from the stabilizing have had a chance to subside. Then do it again, and again, and again. This is where I messed up on my very first batch, and did not do this enough. As a result my first wine had a carbonated mouth feel to it like a flat champagne. Now I go through a complete battery on my drill ensuring the CO2 is scrubbed off.

Next, empty the packet of Chitosan into the carboy. Derived from oyster shells and other shelfish, this additive joins with the free floating yeast particals, that were previosuly suspended by the bentonite clay and once joined, all three become more dense than the surrounding wine, and as a result fall to the bottom.

Stir the Chitosan in virgously using the drill bit then top up the carboy with the wine reserved earler and place an air lock back on top. Allow the wine to sit for another 8 days to give the settiment a chance to settle to the bottom. 

In 8 days we will rack the wine again from one carboy to another.

Here is the final step.


Sunday
May082011

Making your own wine step two: racking and secondary fermentation

IMG 1728

So our wine has been bubbling away quietly for six days now, filling our laundry room with the fabulous scent of yeast turning grapes into alcohol.

If you missed the first part - it is here.

Today begins step two, racking the wine into a carboy and off of the oak chips, and allowing it to go through a secondary fermentation process.

This begins by ensuring the wine is now at a specific gravity of 1.010 or lower. If your wine is not at this level yet, leave it be for another few days. Depending on the season and subsequent;y if the temperature in your storage location is cooler, this can take longer. If you wine is stuck at 1.080 - 1.100 - then you may have what is called a stalled fermentation. Bummer. This can be caused by everything from temperatures out of range, bad yeast or (hopefully not) bacteria introduction that has killed the yeast.

There are many discussion boards and areas to find solutions to this problem - I like the Wine Maker Magazine and site. It has lots of good articles on this issue and getting started in general.

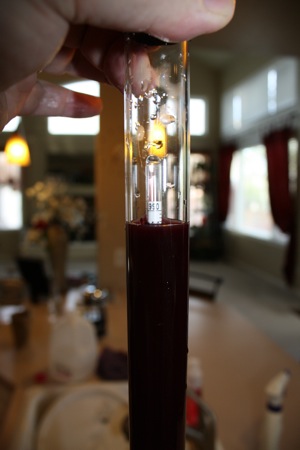
Drop the hydrometer into the wine thief and suck up a sample of your brew. - Don't forget to clean and sterilize it again, before you do this - remember, clean, clean clean. Your hydrometer has been sitting in a cabinet for a week now growing what ever you left on it, and you have a $100 investment in grapes here.

IMG 1730

Our wine is currently sitting at 1.000, perfect.

Take this opportunity to drop a few CC's of the wine from the wine thief into a wine glass and taste it. The wine is murky, and cloudy but has a great aroma and at this point tastes interesting. If you tasted the plain grapes a week ago, you can definitely tell a difference. Much less sweet, beginning to resemble wine. You can tell one of the byproducts of the fermentation process is CO2 as the wine has a carbonated mouth feel.

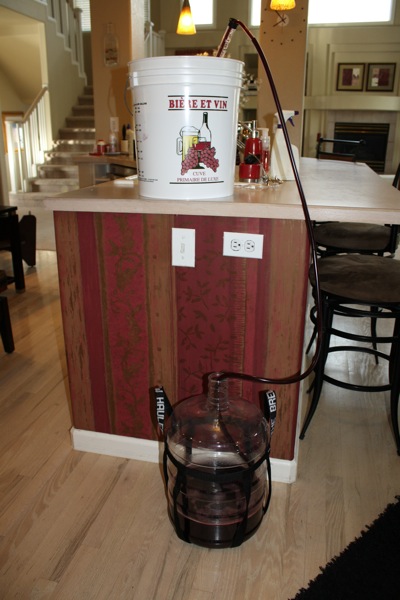
Time to clean a carboy and transfer the wine from the primary fermentation bucket. One of the items in most kits is an auto siphon. A bicycle pump like devise with a plastic tube. Place the bucket on a counter or above the carboy and the carboy on the floor. One quick pump and its off to the races.

IMG 1734

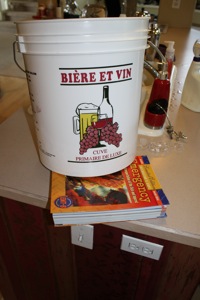
As the process moves along, I have found that placing a book or other object under the side of the primary fermentation bucket helps get the majority of the wine out with a minimum amount of the sludge. Remember the primary purpose is to rack off the oak and most of the sludge that has settled to the bottom in the last week. Don't 'stir' the wine with the siphon. Stick it into one spot, then leave it there.

IMG 1739

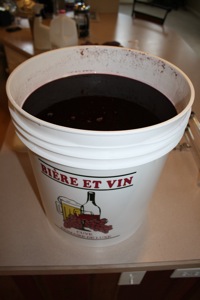
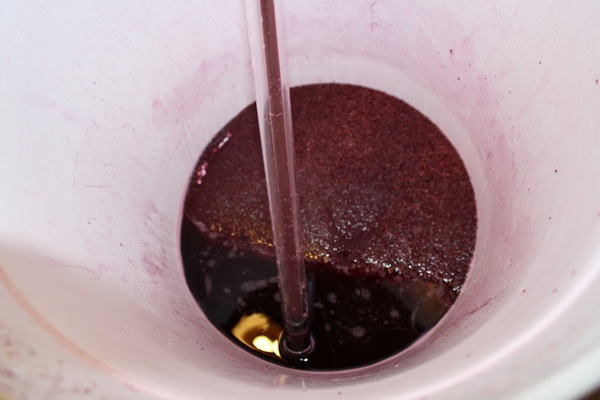
Here is a shot of the sludge left behind in the bottom of the bucket.

IMG 1738

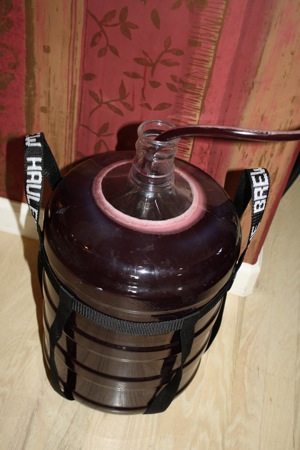
As you get close to the end, be prepared to lift the end of the siphon above the surface of what is left, as to not overfill the carboy. I had a bit too much liquid in my bucket once on a previous batch and was not paying attention and overflowed the carboy. This is a mess you want to avoid if possible.... trust me.

IMG 1737

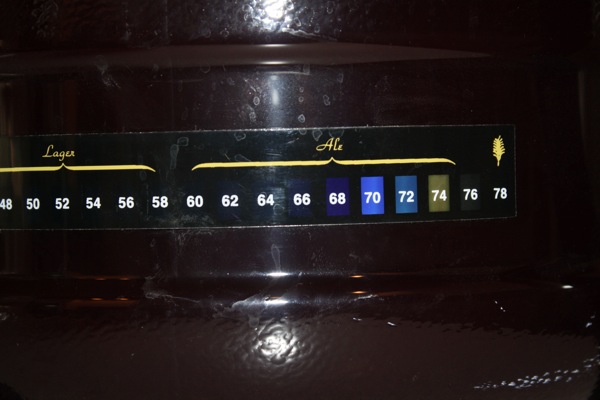
Once again check the temperature of the wine, and ensure it is in the sweet spot of 65-75 degrees. The brew store has these great aquarium temperature stickers that can be affixed to the outside of your carboy so you can monitor the temperature easily.  One trick I have read about if brewing during the dead of winter is to set the carboy on a old heating pad plugged in on low. Mine appears to be about 72 currently.

IMG 1740

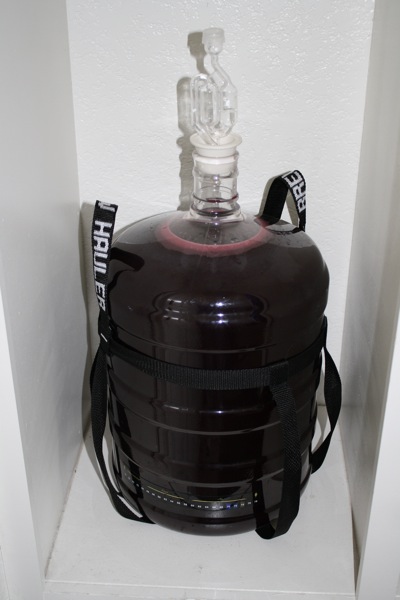
Finally top off the bad boy with an air lock and its back into storage for another 10 days or so. Once fermentation has reached 0.996 or less and stabilizes, (remains the same over two consecutive days), we will begin the clarification process.

IMG 1741

Check back soon. This is a good time to have a glass of wine, and explore possibilities for what you are going to call it, and how you want to design the label!

Happy Mothers Day to everyone!

Step 3 is here


Thursday
May052011

How to get a better airline seat by cheating.

Airline Seat

I almost did not want to re-post this little trick as it seems too good to be true.  I have not tried it, but wish I would have known about it before my recent trip to Hawaii where we had to sit apart because we booked it separately.   I will be trying it on my next flight.  Let me know if you have any success...

Reposted from LifeHacker

______________________________________________________________________________________

How to lie, cheat and steal your way to a perfect flight.

Flying generally sucks, but it doesn't have to be awful. If you're willing to break a few rules and compromise your status as an upstanding moral citizen, the dark side has a few secrets to help you have a more enjoyable flight.

One of the wonderful things you get, thanks to the internet, is the ability to choose your seat online when you book a flight. The problem is, so many of those seats are reserved for people who have some sort of priority status or are willing to pay around $25 to sit in a seat that's mildly better than the one the airline assigns them. If you feel you deserve a better seat for the price of your patronage and don't want to pay a fee, wait until 24 hours before your flight, or fly the same airline so much that they give you special status, sometimes there's a way around these restrictions.

Some airlines handle seat selections through the URL. Why? I have no idea. It's stupid, because URLs are easy to hack. When you select a seat by clicking on it, often times that seat is sent through a URL variable as you travel to the next page. You might see something like http://someairline.com/checkin/seatassignment.php?seat=4A, but it'll likely have a few more variables and be a bit more difficult to parse at first glance. Make an initial seat assignment, note the seat number and letter, and watch the URL to see where your seat appears. Copy the URL, finish up the process, and then go back to change your seat again. When you get to the selection screen, pick a seat that you want that's reserved for someone the airline likes better than you (e.g. an exit row seat or other premium-type seat that's free for special people). Paste in the URL that you copied but change the seat to the premium seat you want. Hit enter and watch your seat assignment change to the fancy seat like it was selectable all along.

Rest of the article here

Sunday
May012011

Today I make wine! - Chilean Cabernet Sauvignon. Come follow along...

Wine 915

Yea!  Today is wine making day. This will be batch three for me, with the first two being an Argentinean Malbec and a big red California Zinfandel. The Malbec, my first, was not so great but from it I learned a lot. I did not get all of the CO2 scrubbed off of it before I bottled it, so it had a carbonated mouth feel. The second batch I made, the Zin was completely yummy but unfortunately is now completely gone... so once again it's wine making day. This time I will blog about all the steps and equipment as I have now become a true fan of making your own wine!

I have to give credit for getting me hooked to a friend that has been making her own wine for several years now. She invited me to a grape pressing party and open house at her new place down by Franktown and I have been hooked ever since. She has since progressed to buying her own grapes in yard lots, and pressing them - hence the pressing party - but she said that she stared with wine kits. The day was very fun and by the end of it I was covered from head to toe in grape must. I think her and her husband are planning on planting some vines soon, so this can be as easy or as difficult as you choose. I like easy and the kits are lots of fun.

I did a little research and found that the local beer brew hut on Chambers and Hampden has all the supplies you need to get started for about $150.00. This includes a 6.5 gallon primary brew bucket, a 6 gallon carboy, long stirring spoon, stoppers and air locks, an auto siphon (very helpful for racking - transferring the wine to another container) and tubing, a hydrometer for measuring the specific gravity, and a bottle filler.

IMG 1716 IMG 1717

A few other things I have picked up along the way include a second pail, with a spout (makes bottling much easier) a carboy carrier because six gallons of wine is not a light thing and this will save your back. I am using the plastic carboys. I have read that some people will only use the glass ones. They are heaver, break and are much more expensive. I am unsure of the advantage....

Finally, invest in a drill mounted paint stirrer - above - you will thank me later.  Primary fermentation is yeast eating the sugar in the grapes and producing ETOH (Good) and CO2 (Bad) - During a later step, you will need to scrub off all the CO2 that you can, so you don't end up with champaign and trying to do that by hand with a long spoon is not very easy.


Today I chose a Cabernet Sauvignon from Chile. The brew store has several kits available ranging in price from about $75 to $150 depending on the grape, region and brand. This one was Selection International and was $109. It will produce about 30 bottles when done or about $3.60 a bottle for very good and definitely drinkable wine.

IMG 1714 IMG 1715

The kit comes in a box that contains a bag with 6 gallons of grape juice from the vineyard, yeast, oak chips, potassium metabisulphite, a package of isinglass (clarifier), a package of bentonite clay, and some instructions.


The first step is to clean, clean clean - and then when you think everything is clean, clean it one more time. Bacteria is no friend to wine making and can quickly turn your $100 batch of wine into a foul smelling nightmare, so I can't stress this enough. I found the same when Marty and I used to make beer, so take the time, and wash your stuff more than once. There are special cleaning agents available from the brew store that kill wild yeasts and work very well. They also have a no rinse sanitizer that I mix up in batches and keep in an old spray bottle. Spray everything with a good coating of the sanitizer before it touches the grapes. Also, spray the lid to the bag of grapes before you open it, etc. If you are diligent, you will find it pays off in the long run.

IMG 1718

Next put two liters of warm water in the bottom of your primary fermenter and mix in the bentonite clay powder. Bentonite has an affinity for yeast and also stays in suspension in the grape juice, not settling to the bottom. This will help your yeast evenly distribute itself across your grape juice and provide for an even fermentation.

IMG 1719

Next add the bag of grape juice, being careful to not splash everywhere - grape juice stains everything it touches, including the counter. Wipe up any spills as soon as possible if you want to stay married. Fill the grape juice bag with about a half gallon of water and slosh it around to get every drop of juice and pour that into the bucket. Then fill to the six gallon line with water (I use tap water, as ours tastes pretty good, but the instructions suggest you may want to use bottled water or filtered water from the fridge if yours does not)

Mix will with the spoon (don't forget to sanitize it first) and incorporate the bentonite throughout the grapes.

IMG 1723

The next step is to check the specific gravity.  The wine thief that comes in the kit is a great little tool and you drop the hydrometer into it and shake it up and down in the bucket. It sucks up the wine until the hydrometer floats and you can get a measurement. Mine is 1.084. This measurement will tell you the sugar / ETOH content in your wine and is how you monitor the fermentation process. As the yeast eats the sugar and produces alcohol, the specific gravity decreases until it is ready, below 0.996. Did I mention that making wine is also lots of fun with a glass of wine in your hand? The only problem is that the longer it takes, the harder the hydrometer gets to read....

IMG 1724

Once you have your first hydrometer reading, the next step is to mix in the oak chips that came with the kit. This gives the wine some character and mimics aging in an oak barrel. Some kits come with chips, other with an oak cork screw stick that steeps in the grapes like a tea bag. Some kits also come with elderflowers or other items based on the type of wine you are making.

IMG 1725

Mix well to incorporate the oak chips under the surface of the wine. Check the temperature of your grapes, and ensure it is between 65-75 degrees for the yeast to work its magic. It is easiest to modify this by adjusting the temperature of the water you add when topping up to six gallons. Finally sprinkle the packet of yeast onto the surface of the grapes, but do not mix it in.

IMG 1727

Place the lid on the primary fermentation bucket (Spray the inside lip well with sanitizer after cleaning, before you close it) and put an air lock into the hole. Place your bucket someplace within your house that maintains a relatively stable temperature between 65-75 degrees. In my case, we have some lockers in our laundry room that work just perfectly. If all goes well, the air lock should begin to bubble (fermentation should start) within 24-48 hours. The wine should remain in this bucket until primary fermentation has lowered the specific gravity to 1.010 or below - about 5-7 days. The lower the temperature, the longer this will take.

Come back next week and we will move to step two - racking and secondary fermentation.

Step two is Here